
Intro
In this project, we were assigned to design and plan a small house or building that uses no energy and relies on being extremely energy efficient. We planned to design to build on a location around campus, we wanted to design a house that let light in during the winter, but kept light out during the summer.
We started by brainstorming and researching different house designs. This gave us somewhat of an idea of what we would be building and we then started to look for different locations.
We started by brainstorming and researching different house designs. This gave us somewhat of an idea of what we would be building and we then started to look for different locations.
Location
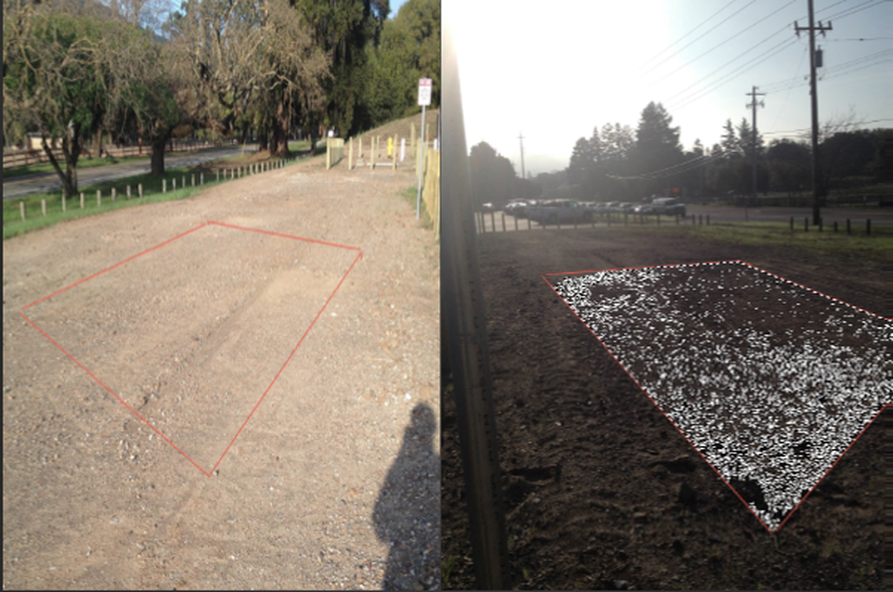
We first started by targeting a wide range of locations around the school and kept our location ideas open minded. We knew that we wanted a location that got a good amount of morning sunlight so that it heated up quickly, but we also knew that we were looking for a location with a fair amount of accessibility and publicity. Over the next week, we visited the locations we were considering during various parts of the day and took note of the amount of sunlight. We finally decided on the location near Novato Boulevard near our STEM classroom. This location was chose because we thought it got the best morning sunlight of anywhere on campus, but as it was along Novato Boulevard it also got a large amount of publicity.
Key Features
- Four windows on the East and South sides for best sunlight.
- Skylight on the East side of the roof for light during the middle of the day. This skylight also has a retractable cover for hot summer days.
- Carpet for added thermal mass to the interior and to trap heat early in the morning and after the sun sets.
- Light colored walls to make the room feel bigger and to reflect light around the room for good lighting
- Open celling to make the room feel bigger and to add architectural interest.
Windows and Skylights
We included all four of of windows on our South and East side for the best sunlight.
All of our windows are 4 feet wide by 3 feet tall. There will be two windows evenly spaced on both the South and East sides.
Our skylight will be placed on the East side and is 1.8 feet by 3.56 feet. We placed our skylight on the East side to allow space for possible future solar panels on the south sides because the south side is the best for solar panels and skylights
Usage
We designed our passive solar house to be a place where STEM students can socialize and work together. This can be useful because all STEM students have work on a common subject and can help each other on work and assignments. It can bring the STEM community closer and tighter-knit. We would like to keep this for STEM students only because it can get crowded from the other students.
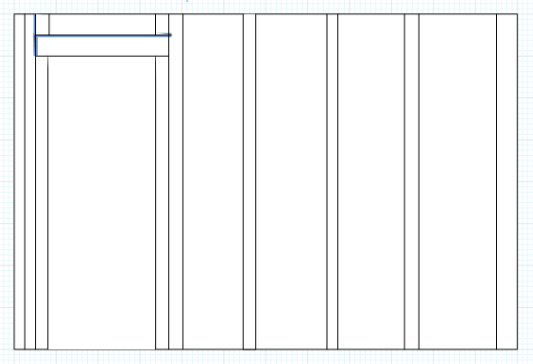
Blueprints
We included six digital blueprints of our walls, roof and floor. These show the interior design of the house.
Roof
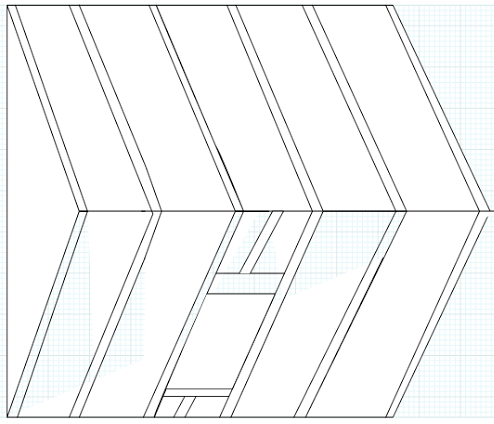
East Wall

floor
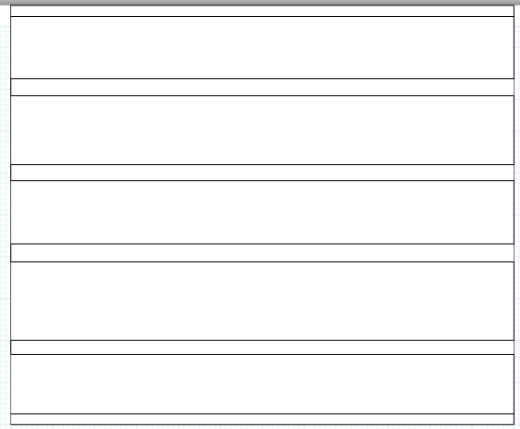
West wall
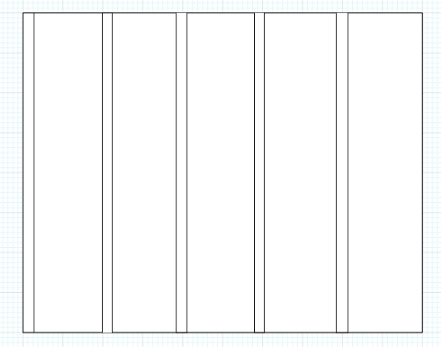
South Wall
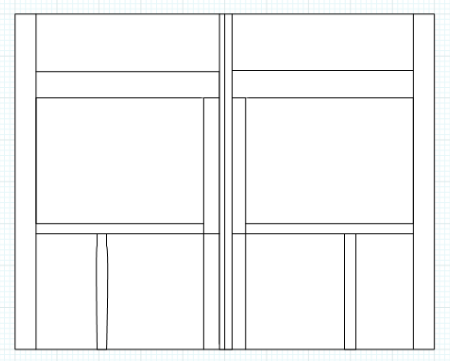
North wall
Digital Model
We made a digital model of our house on Sketchup. This digital model included correct dimensions and design for the whole house and was used as the the model for our house. It also used correct materials that we planned to use for this house. Although this site does not have the ability to display the digital model, we did display it at the presentation.
Budget and materials

Our Budget for this project was $5,000.00
We researched the prices of different materials trying to find cheaper but still good quality and chose accordingly. Our total price has come up to $4,487.48. We found our price by first finding out how much we will need of each materials. Then, we found how much that will cost. Finally, we added tax and totaled up to find the total price.
We researched the prices of different materials trying to find cheaper but still good quality and chose accordingly. Our total price has come up to $4,487.48. We found our price by first finding out how much we will need of each materials. Then, we found how much that will cost. Finally, we added tax and totaled up to find the total price.
Juustification
Concepts
- Conduction - transfer of heat through a material
- Convection - transfer of heat through a fluid
- Radiation - energy transmitted as rays, waves, or particlesHeat - a form of energy (Q)
- Thermal Conductivity The concept that yea travels from warmer places to cooler places.
- Specific Heat - a physical property of matter that states the heat capacity of a certain object. Objects with higher numbers take longer to heat up, but also take longer to cool down. Objects with low specific heat capacities heat up quickly, but also lose that heat relatively fast as well. Water is an example of a fluid with a particularly high specific heat of 1. This means that that water retains its temperature for longer, but also takes longer to heat.
- Heat Absorption- Heat absorption is the absorption of heat through a substance. As a result the object changes in chemical physical appearance. For example, before you put a turkey in the oven it is white and raw but after a couple of hours the turkey become golden in color and the meat is tender.
- Heat Reflection- The opposite of heat absorption, this means that an object that reflects heat denies to absorb heat and doesn't take heat in quickly.
Reflection
I think that this was the best and most useful project so far this year. I learned a lot from the material testing lab and from the the rest of labs we did to better understand the concepts of how these things work. I think that the most useful concept that we learned was how to structure/design/build a house. This is a useful concept because it helps us understand the structures we live in and why they were designed this way. I think that learned a ton from this unit and this was the most useful unit
